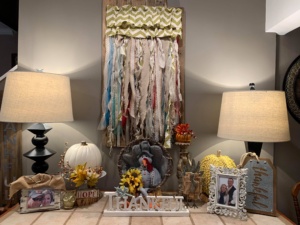
 Ribbons and Rags can be the beginning to something shabby chic, boho, and beautiful. Elevate your home decor with a quick and inexpensive piece that is unique and coordinates with your color scheme.
Upon a recent trip to the local thrift store, I walked away with an adorable green and white chevron ruffled curtain, several pieces of new fabric, and a huge spool of ribbon. What would I use them for? No clue, but I knew that there was something cool on the horizon. I didn’t mind dropping $1.99 for the abundance of fabric from the curtain, and the other pieces would definitely be put to good use with the holidays around the corner. The ribbon would have cost about $40 for the amount that I snagged for another $1.99.
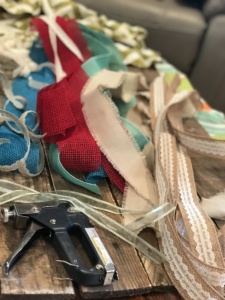
My collection of lace and ribbons grew quickly after a brief detour by the Dollar Tree. This is where I found all of my “lace-y” ribbons and colorful burlap. I dug through my existing supplies in the craft room and found more burlap, netting, a cotton string tied fishing net (this had been used at my sons wedding on the grooms table), and other sheer ribbons. I grabbed my staple gun (and the staples) from my Pink Craftsman toolbox, and my pinking shears from the sewing supplies. Time to make a piece of artwork to cover the empty space on my living room wall! I had just removed a large shelf and was waiting on an interesting piece. It’s coming right up!
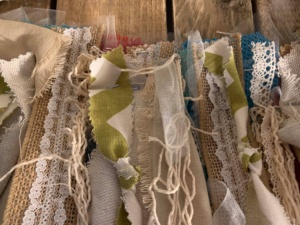
I must stop here to mention, I had a color scheme in mind, so I chose my colors carefully when I sought out the supplies. I also ensured that I had a large assortment of neutral colors. It is important that you also choose different textures. This is what makes this piece stand out!
In months prior, I had salvaged some pallet boards and nailed them together, waiting for the perfect time to use them. Today was the day. If you do not have a pallet board, just find a scrap board that works for you. Most of it will be covered with ribbons. Rough up the edges to make it look old and worn.
So, how did I make this exquisite piece?
- I haphazardly cut the ribbons and netting to fit the length of the board. Do not make them exactly the same length. Cut some shorter and some longer. Make piles of each. You can always make shorter adjustments later if need be.
- Don’t be afraid to tie some of the pieces into knots.
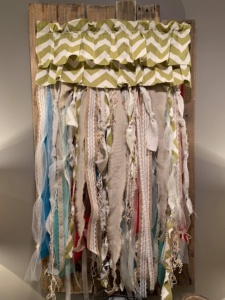
- Start placing a few pieces on your board, leaving room on each edge . I left about 2″ bare on each side. Make a “layer” across your board. When you like the way it looks, staple them down to the board. NOTE: If you know you are NOT going to cover the top edges of the ribbon with a ruffled fabric (or similar), you could simply tie each around a dowel instead of stapling them to the board. You would then just attach the dowel to the board at the end. (hooks would work great).
- Now, add another layer, alternating with different types of materials. Staple. Repeat.
- When done, add a topper. I used a portion of my thrifty ruffled curtain. I stapled it on from underneath so the staples would not show. Again, not everyone will have a ruffled piece of fabric, so use what you have! You could top with a wide piece of gathered ribbon or burlap. Or top with a cute banner. A thin board over the top edges would even be cute. Let your creative juices flow.
If you found value in this post, pass along to your audiences. Happy DIY-ing!